WordPress website building tutorial for beginners: from domain name to server to WP backend
Newbies want to build a website, but don’t know where to start? How to buy a domain name? How to choose a server? Is WordPress operation too complicated? If you want to know the answer, just read this blog.
Whether you are building a foreign trade enterprise marketing website or an independent e-commerce website, the first thing you must do is to have a website of your own before you can start making money with this independent website. So today we will briefly talk about the main steps of building a website, which are mainly domain name purchase, server purchase, and binding them to the WordPress platform for website building work.
Buy a domain name (Domain)
No matter which platform you go to buy a domain name, it is generally recommended that .com is the first choice. Regarding domain name selection, you can also read my previous blog, ” Nine Steps to Google SEO Optimization “, which includes analysis and a brief introduction to the steps of SEO work.
Domestically, we recommend Alibaba.com, but registration is required. Overseas, we recommend Godaddy, NameSilo, etc., which do not require registration and are easy to operate. Here I use NameSilo to demonstrate.
First, we open the official website of NameSilo and check whether the domain name we want to buy has been registered. If there is a yellow try to buy word, it means it has been registered by someone else. Of course, because this domain name is the domain name of my site.
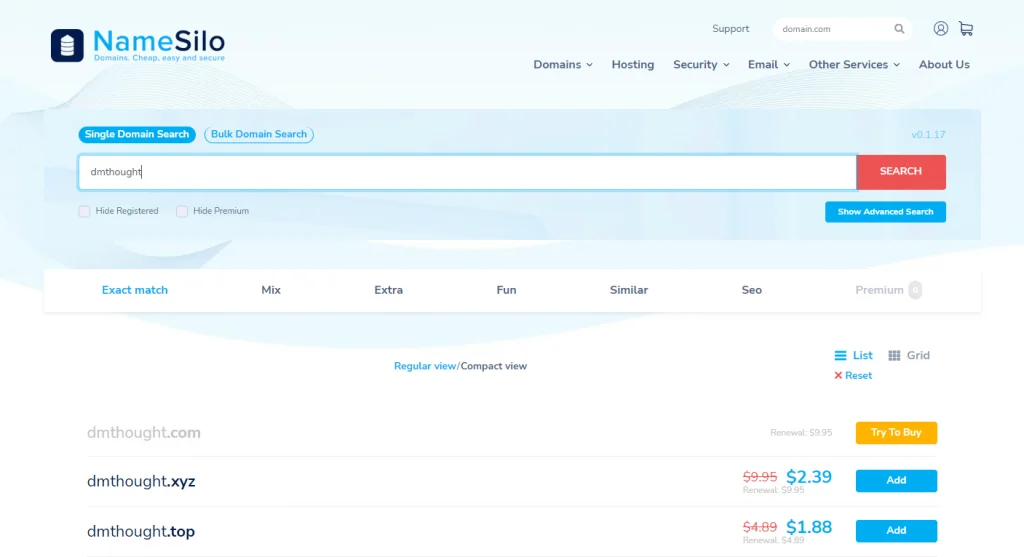
If the blue Add word appears, it can be purchased. We click Add.
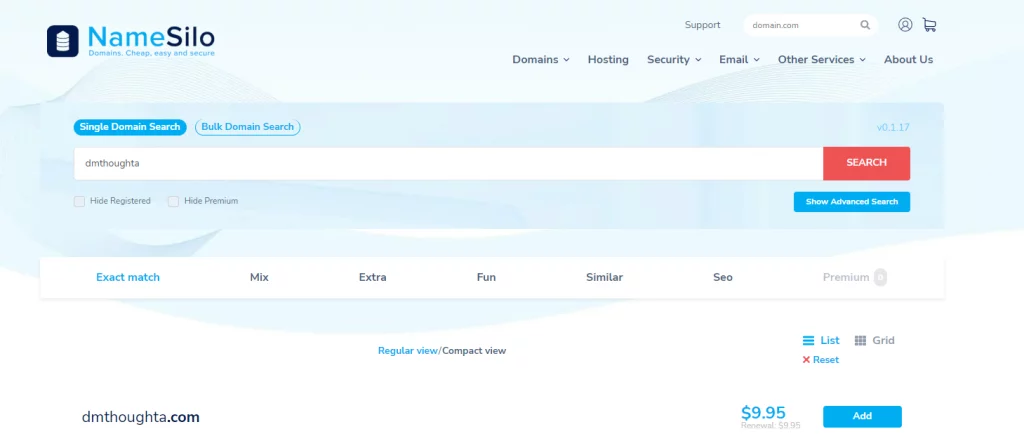
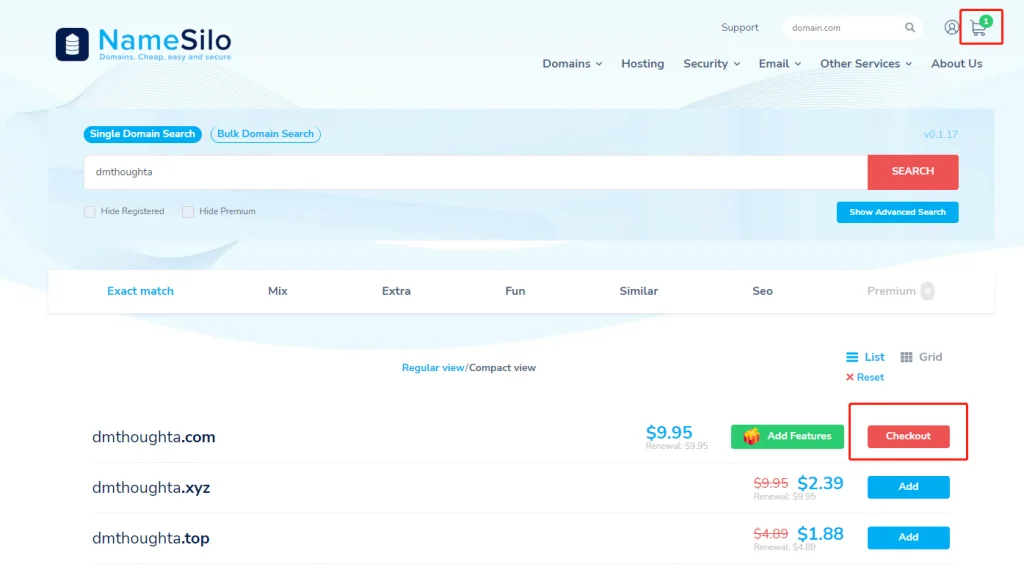
After clicking Add, it has been added to the shopping cart. Next, we click Checkout to settle.
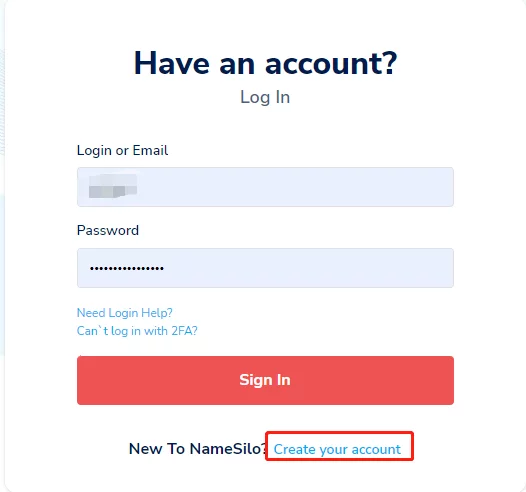
The page will automatically jump to the interface that allows you to log in to the platform account. If you have an account, just log in directly. If you do not have an account, click Create Account below.
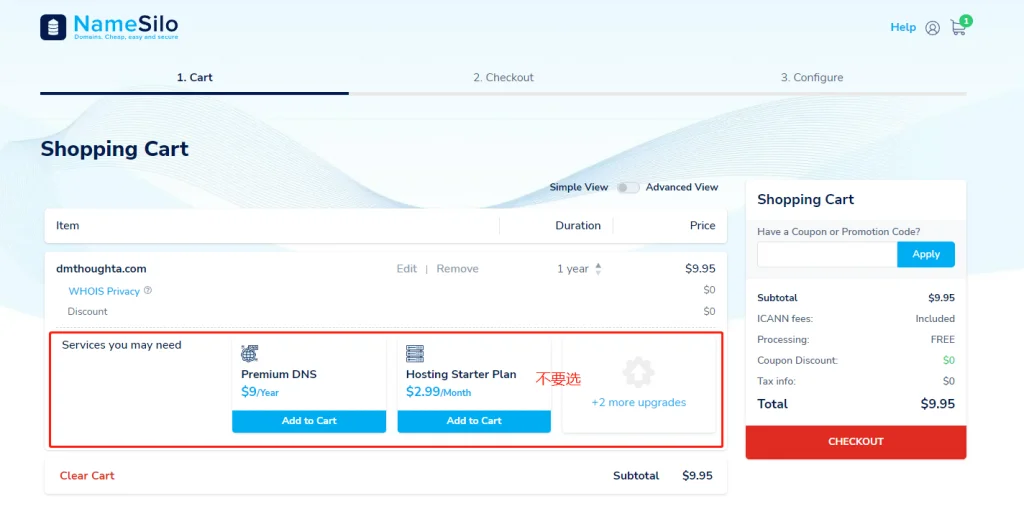
After logging in, you will enter the settlement page. Do not select any of the additional purchase services below, and click Checkout directly.
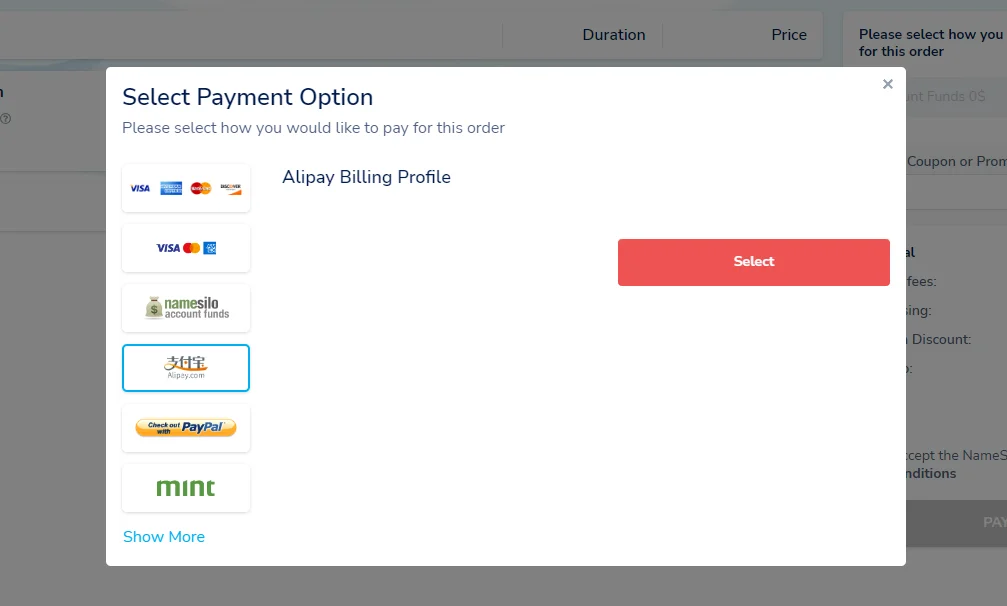
You can choose Alipay settlement, or other settlement methods you find convenient.
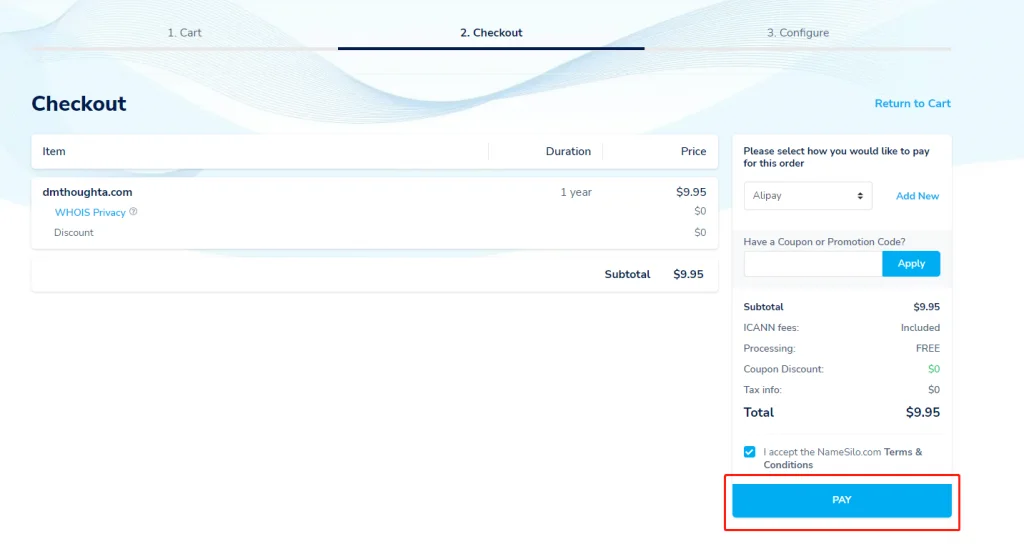
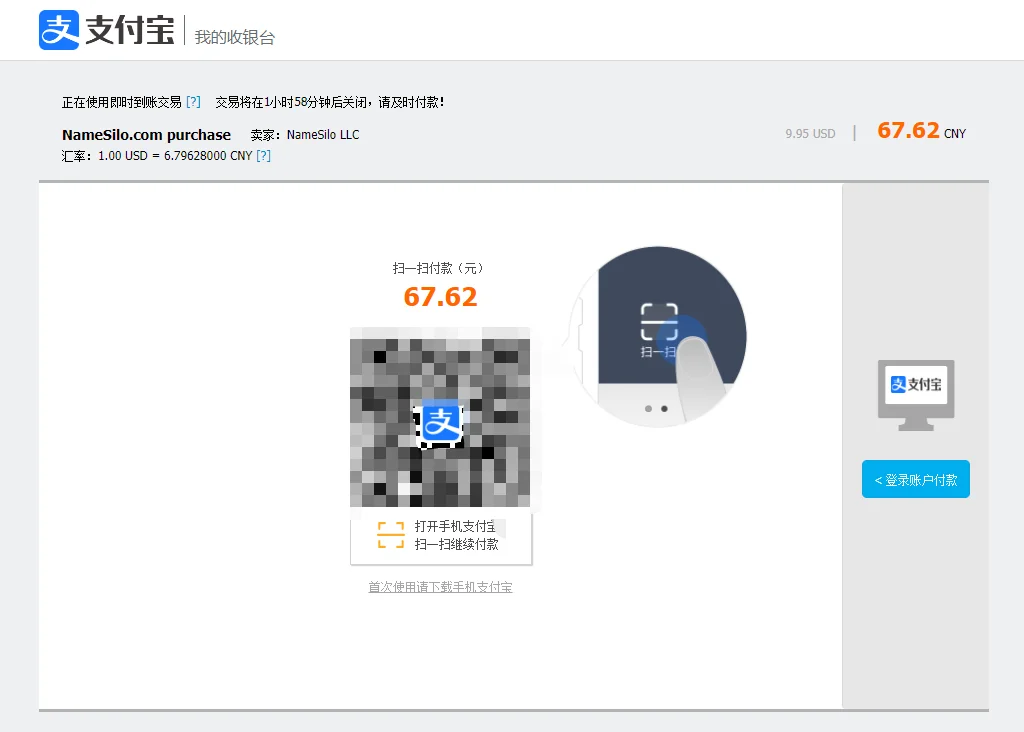
Then scan the QR code to pay and you’re done.
After the purchase is successful, you can see the domain name we purchased in manage domain.

Buy space
The second necessary condition for building a website is to have space, which is a place to store website resources. The text, pictures, videos and other resources of our website are all stored on it, not on your local computer. But many people may have a new doubt, because they usually hear the terms space, server, virtual host, VPS, and cloud server, and they are often confused together, thinking that they are all the same thing. In fact, there is a difference between them. Let’s briefly explain below. The first thing you need to know is that hosts or servers include virtual hosts, VPS and cloud servers.
virtual host
That is, many websites share a server and share the server’s resources, such as CPU, memory, hard disk, etc.
The advantage of virtual hosting is that it is cheap, but the disadvantage is that its performance is relatively poor. After all, so many websites are on the same server.
VPS
VPS is an independent space on the server, where one person has exclusive access to the CPU, memory, and hard drive.
Its advantages are good safety performance and high customizability, but the price will be relatively expensive. The specific choice can be based on actual needs.
cloud server
Cloud servers use more advanced cluster technology to virtualize multiple independent server-like parts on a group of cluster servers. Each server in the cluster has a mirror of the cloud server, thus greatly improving the security and stability of the virtual server. Unless all servers in the cluster have problems, the cloud server will be inaccessible.
Therefore, cloud servers are at a higher level than VPS hosts, with higher stability and security.
Hostinger buy space
Next, let’s talk about how to buy space. Take Hostinger as an example. I bought the space for my website on this platform.
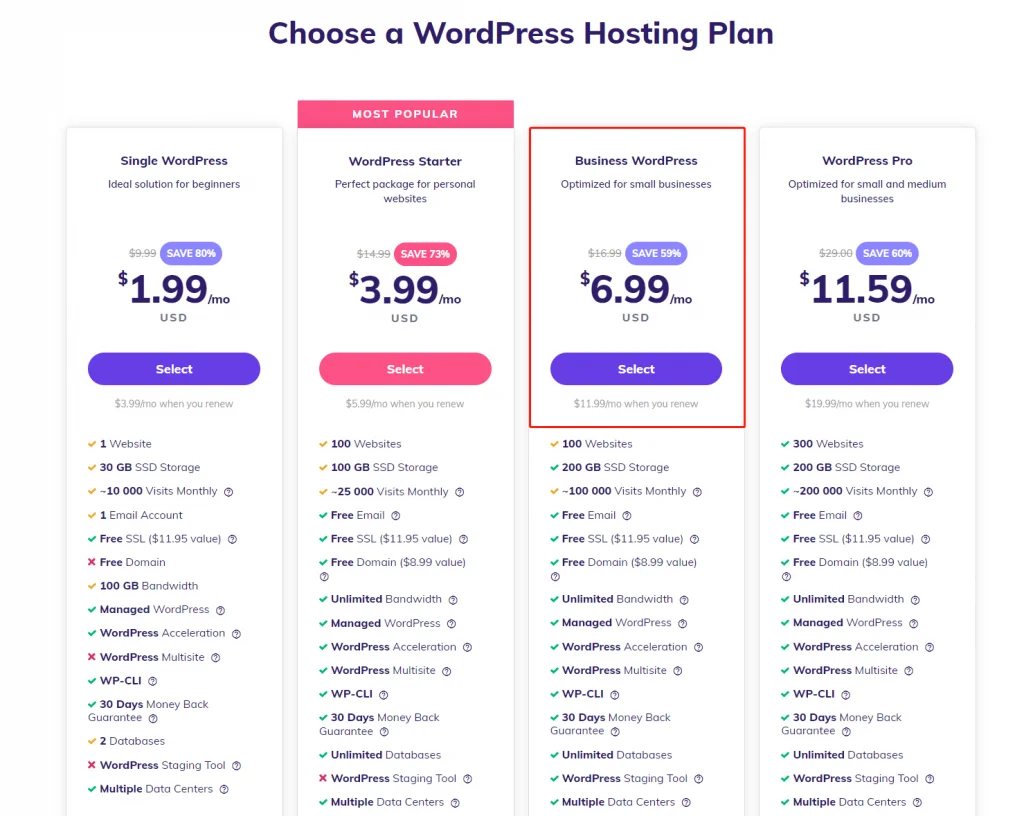
First, we log in to the official website of hostinger , and then select a package. Generally, it is recommended to choose the WordPress Business package for small and medium-sized foreign trade websites. This is the package I chose. This is a WordPress managed host that has been optimized for the WordPress platform and is more suitable for beginners.
Everyone chooses a package of several years according to their own needs. This pricing is really full of tricks. Anyway, choosing 4 years is the most cost-effective. In this interface, you can choose Alipay for settlement.
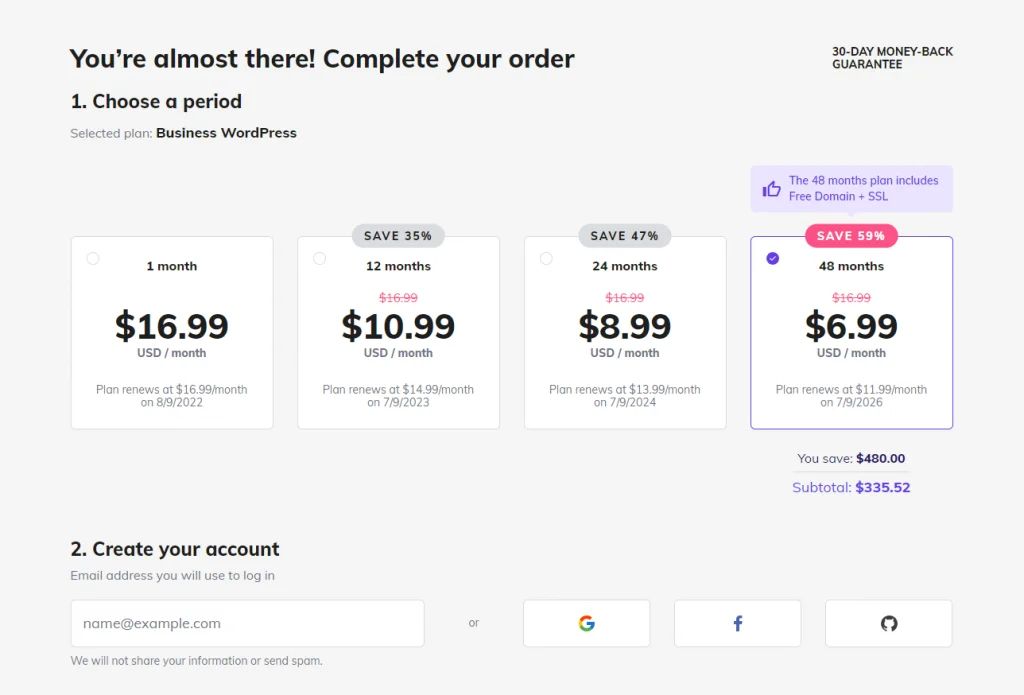
Then click Checkout to go to the next step. For demonstration purposes here, I chose the one-year package.
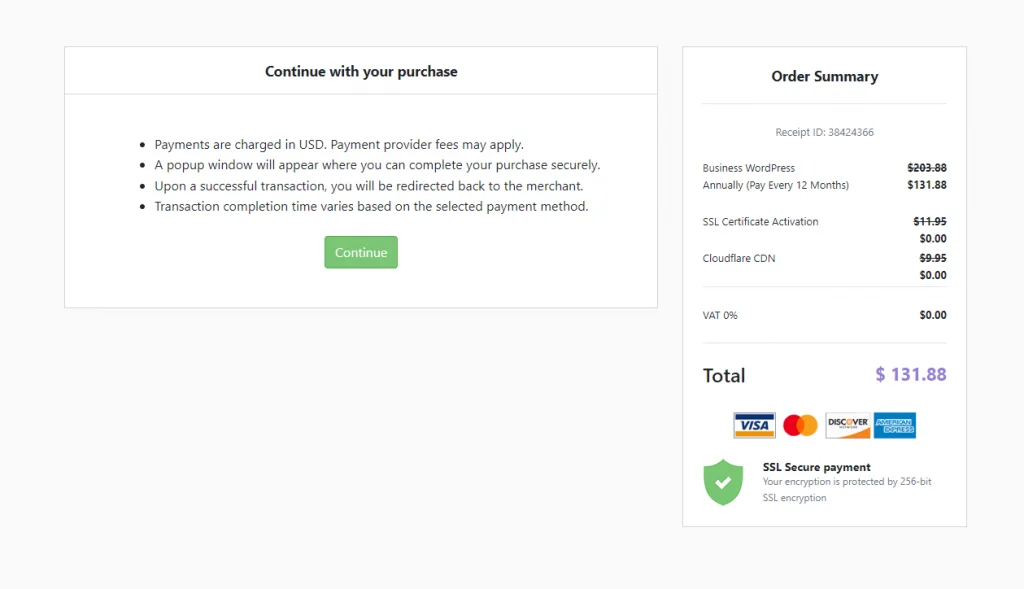
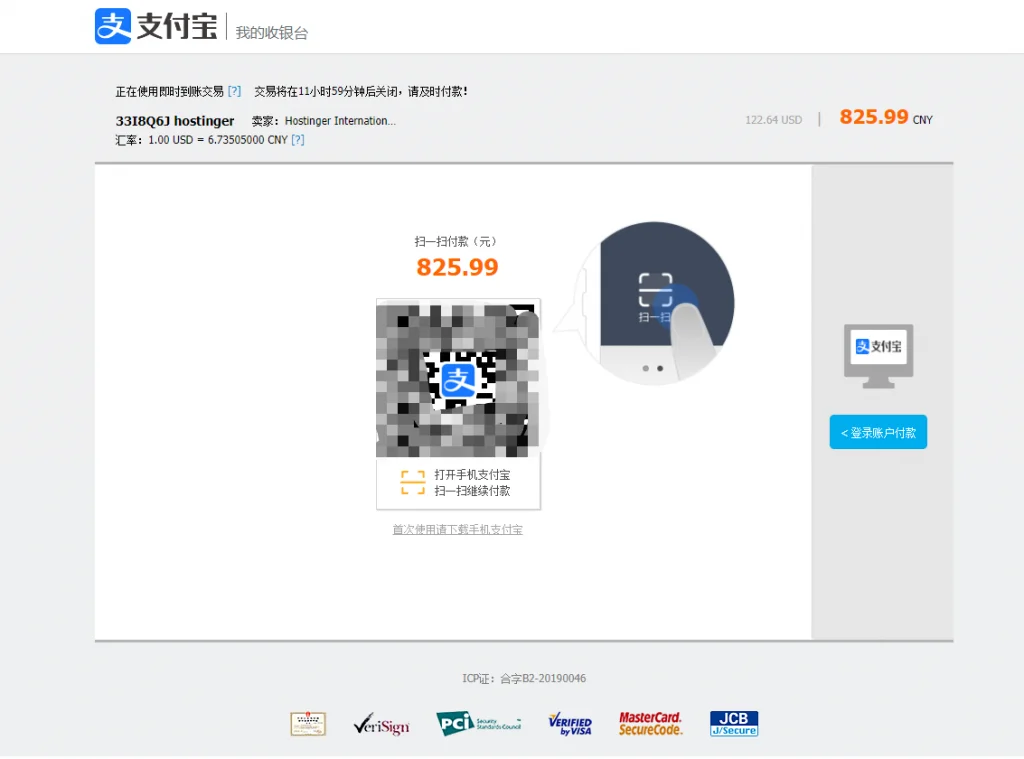
After clicking Continue, you will jump to the Alipay payment code interface, just scan the code to pay.
The interface after successful payment.

After the payment is successful, it will automatically jump to the backend. We select the corresponding website building platform and enter the login account and password.
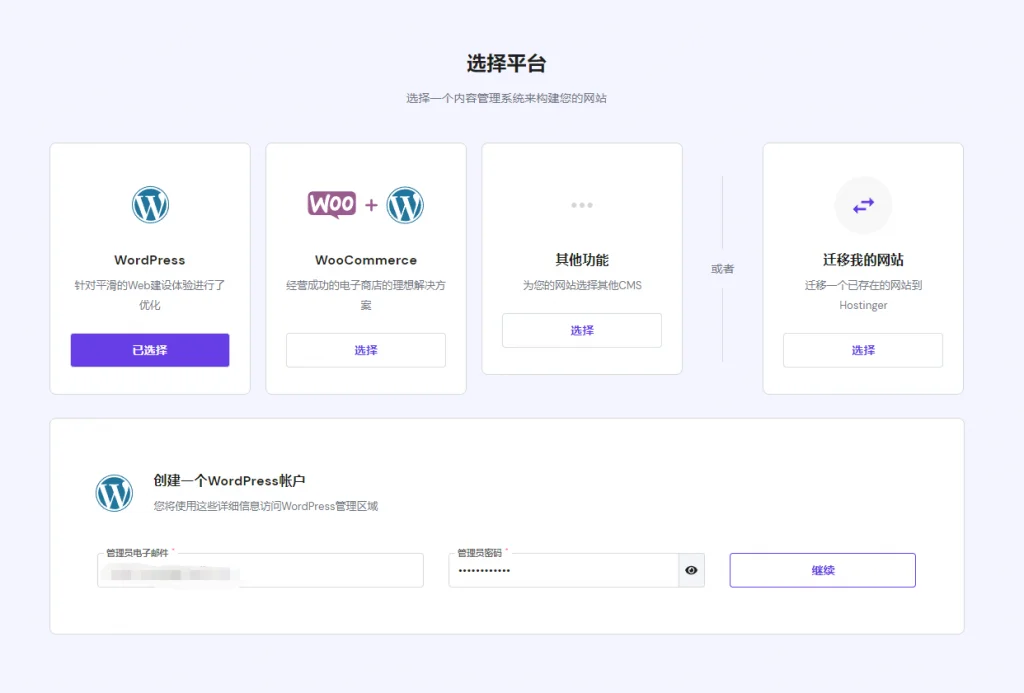
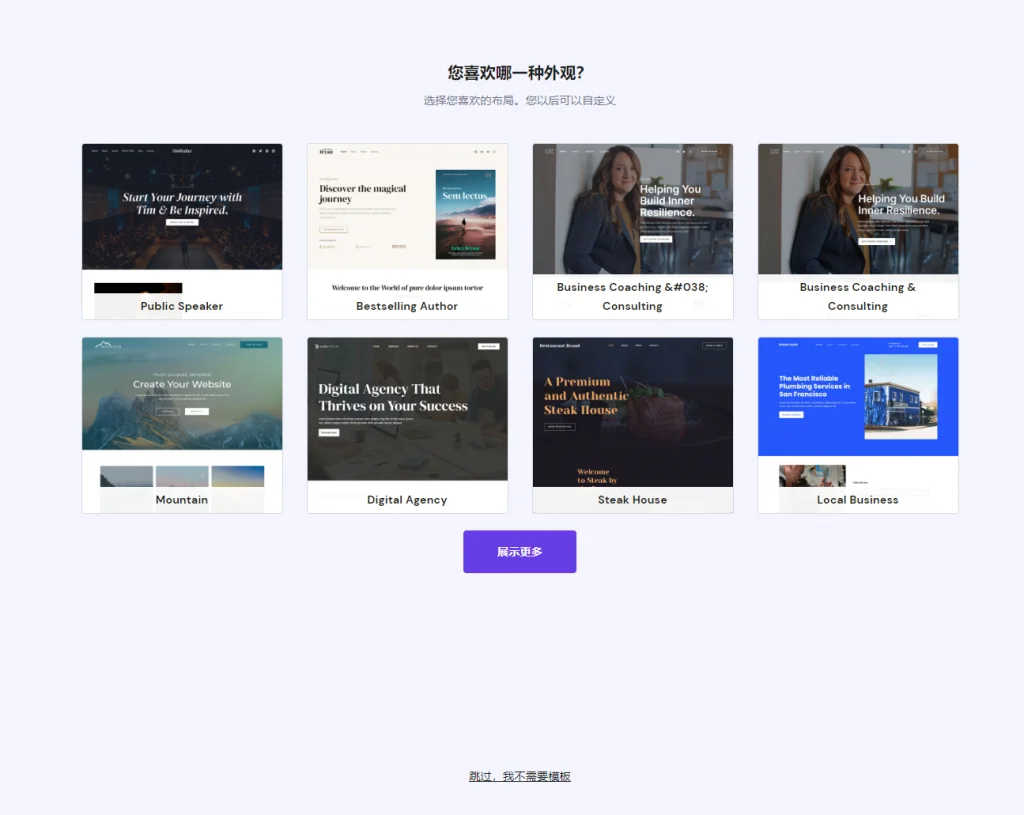
You can choose a template first, but I usually skip it and wait until I enter the WordPress backend before choosing a template.
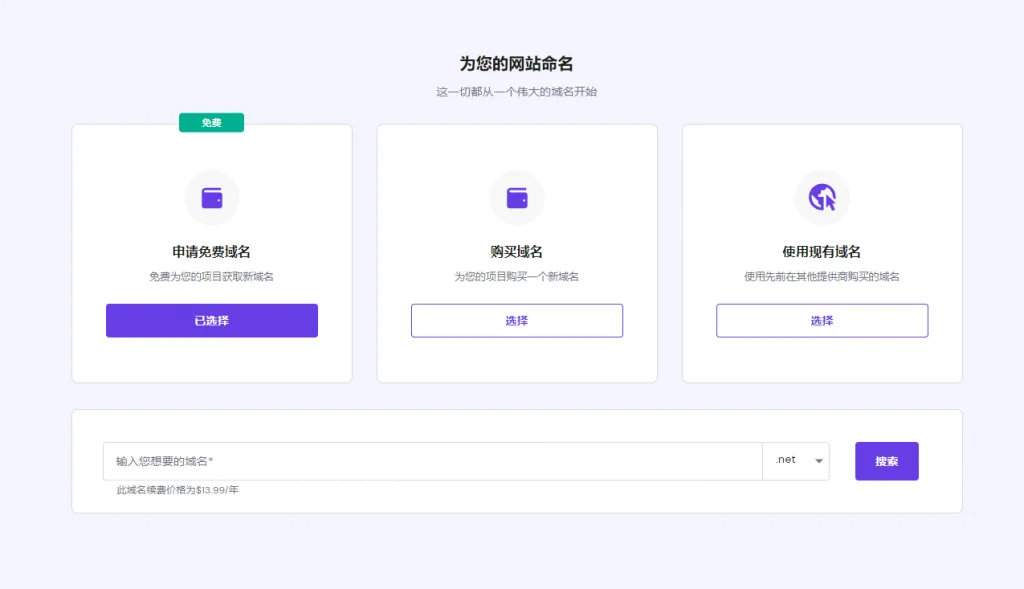
The next step is to bind the domain name. You can go to other platforms to register the domain name, but there is an additional step of resolution later. Because this package comes with a domain name, which is free, you can also register it directly here, which eliminates the steps of domain name resolution and is more suitable for novices. The later renewal price may be 10-20 yuan more expensive.
This step is to choose the server storage location. For foreign trade websites or e-commerce independent stations, just choose the country according to their main market. If you are doing global services, it is recommended to place it in the United States.

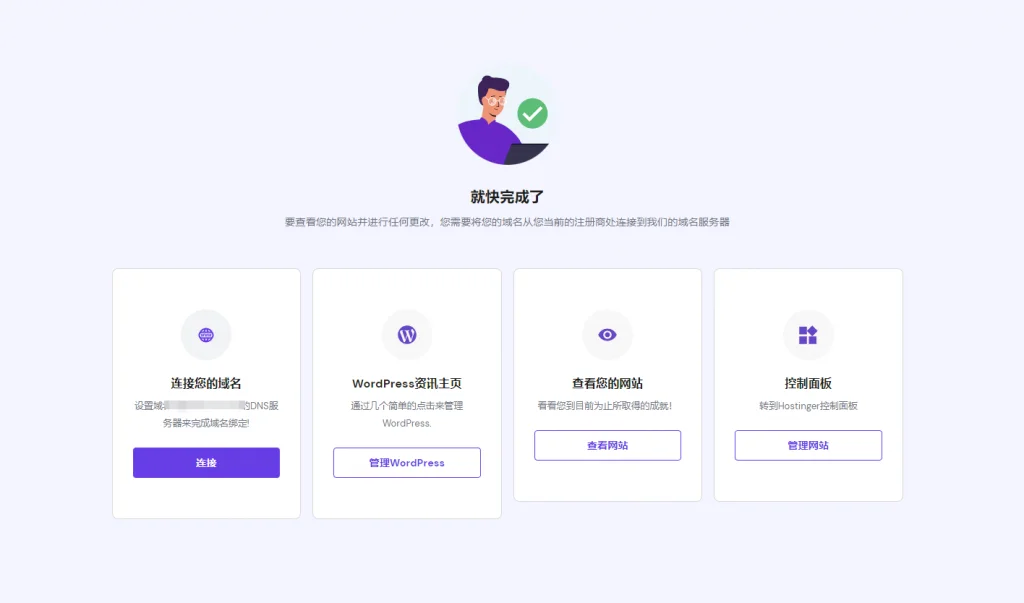
In this last step, you can start managing your own website.
Domain name resolution/DNS modification
If the domain name is purchased on hostinger, there is no need to resolve it. It has been set up for you. If the domain name is purchased on other platforms, we still need to do domain name resolution or DNS server modification, which is also very simple.
For domain name resolution, we will enter this page after clicking the blue ball and delete all the default 5 records.

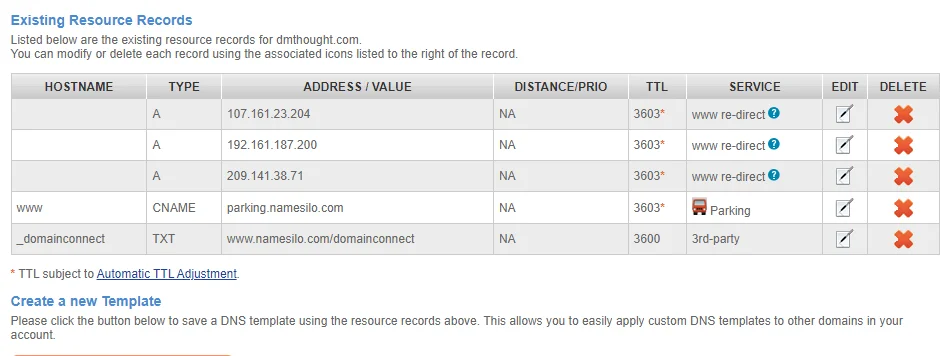
Then add the corresponding A record. If you are unclear, go to the corresponding platform to read the help documentation or contact customer service.

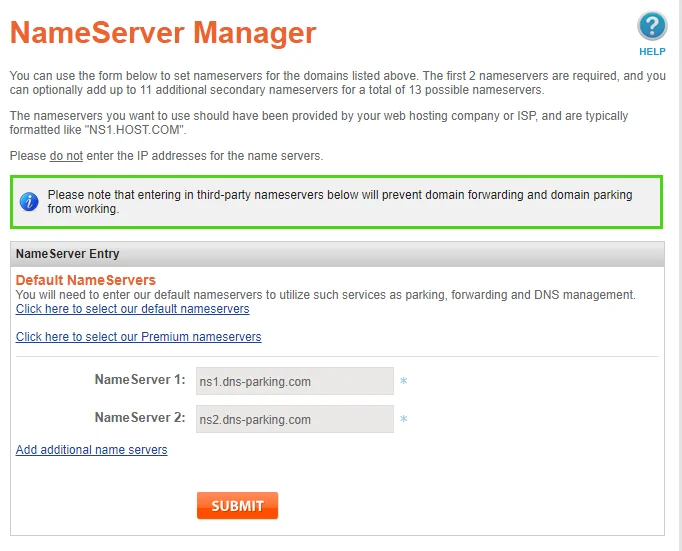
We can also directly modify the domain name DNS. I chose to modify the DNS directly, which is more convenient. First click on the last icon.

Then delete the default 3 DNS and change it to the hostinger background DNS. Isn’t it very simple?

Just copy it in and click Submit.
Install SSL certificate
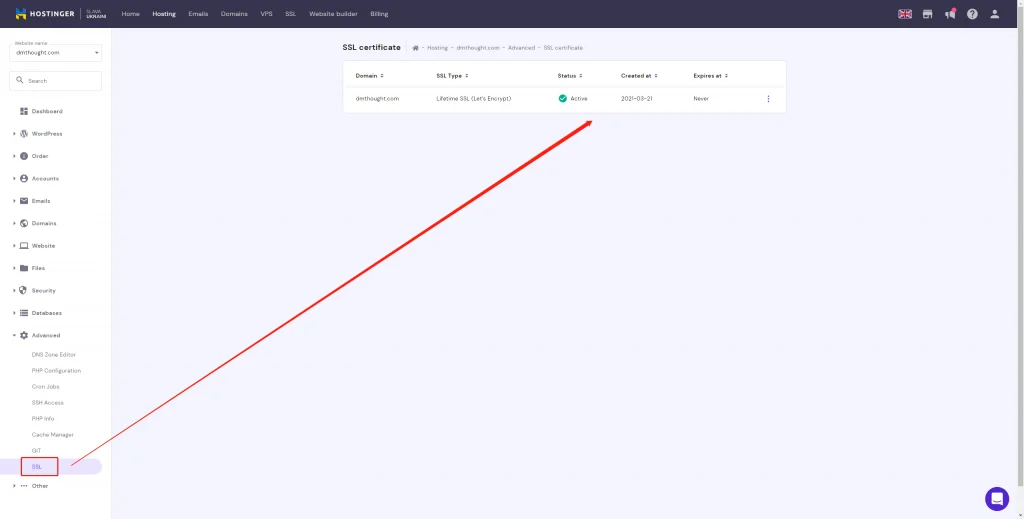
The server we purchased comes with a free SSL certificate, and activation is very simple. Just go into the background and open the corresponding options. Your interface may be different from mine, because my certificate has already been installed. Generally, you can activate it by selecting Set up and then clicking Activate.
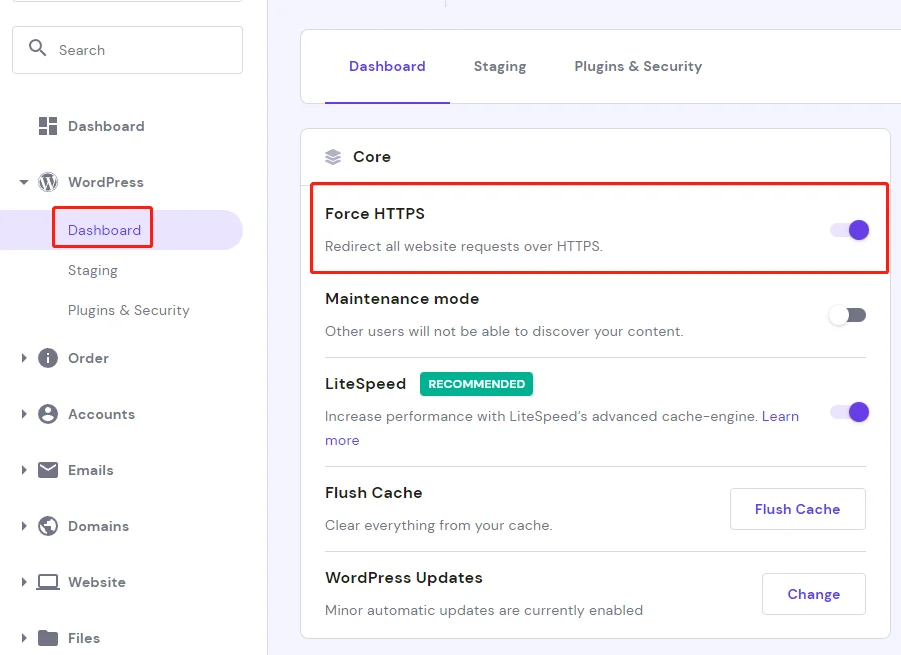
Next, we return to the WordPress main page and turn on the Force HTTPS option.
Finally, go into the WordPress backend and change the URL to one that begins with HTTPS, and you’re done.
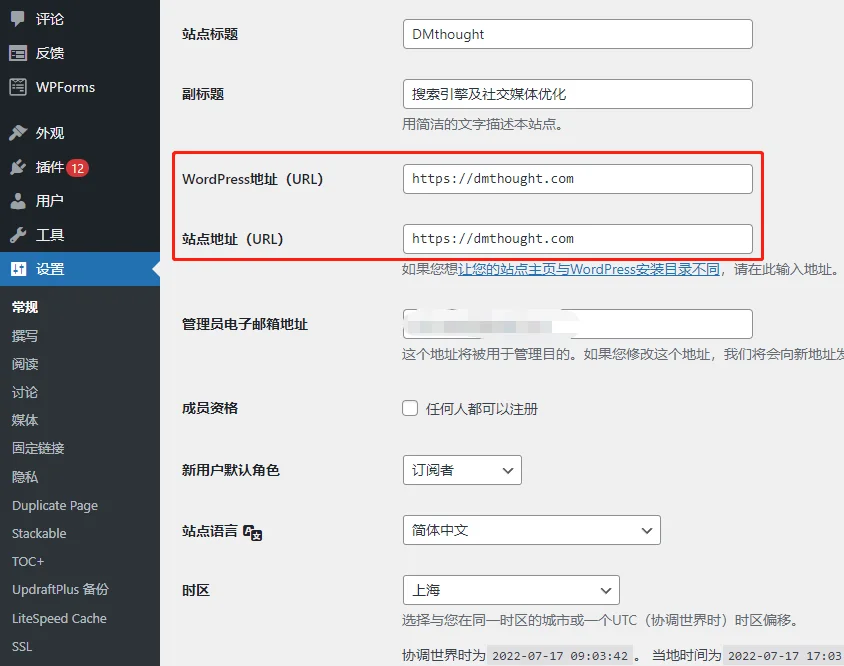
Website settings
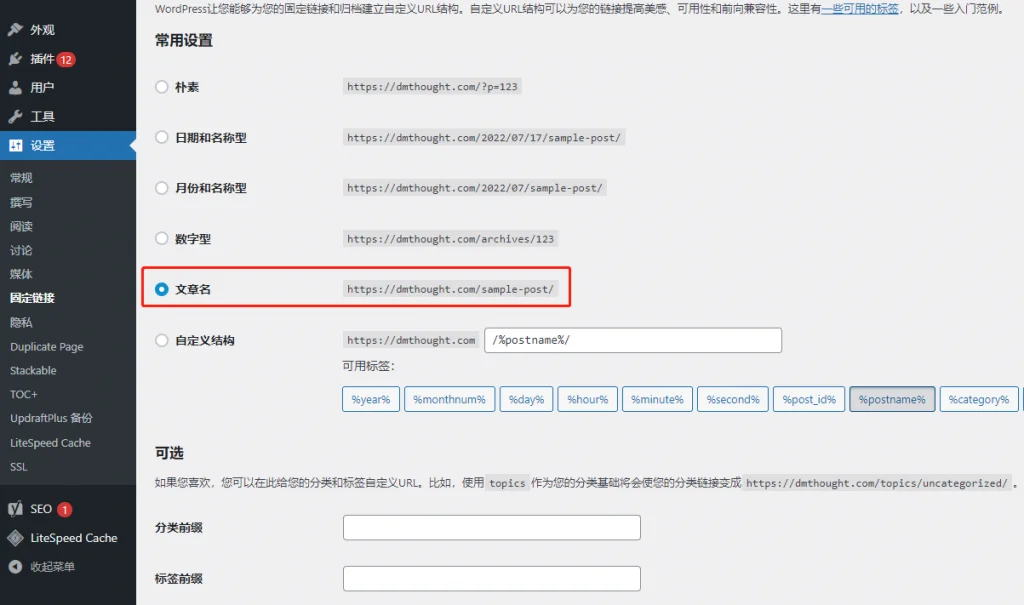
Let’s talk about some simple settings next. We can choose this link in the form of an article name, so that when adding a new page, some unwanted information will not appear in the URL.
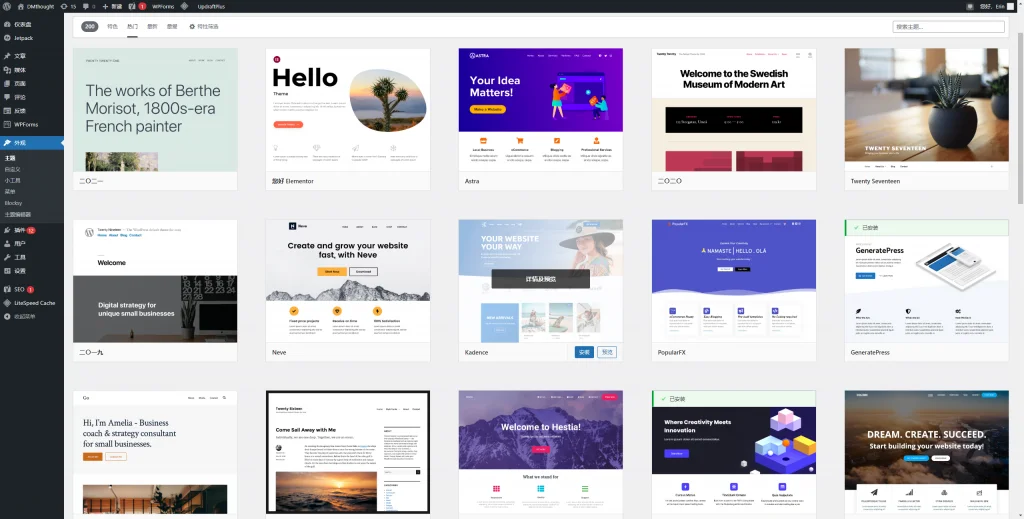
Here you can choose the template you like.

Just click and install if you like it.
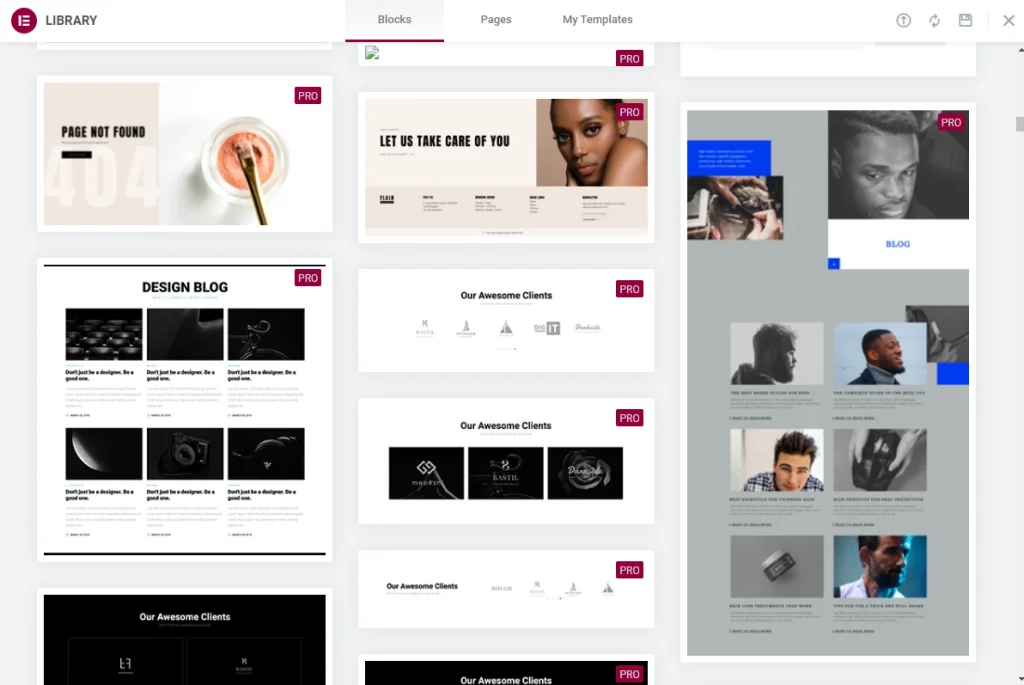
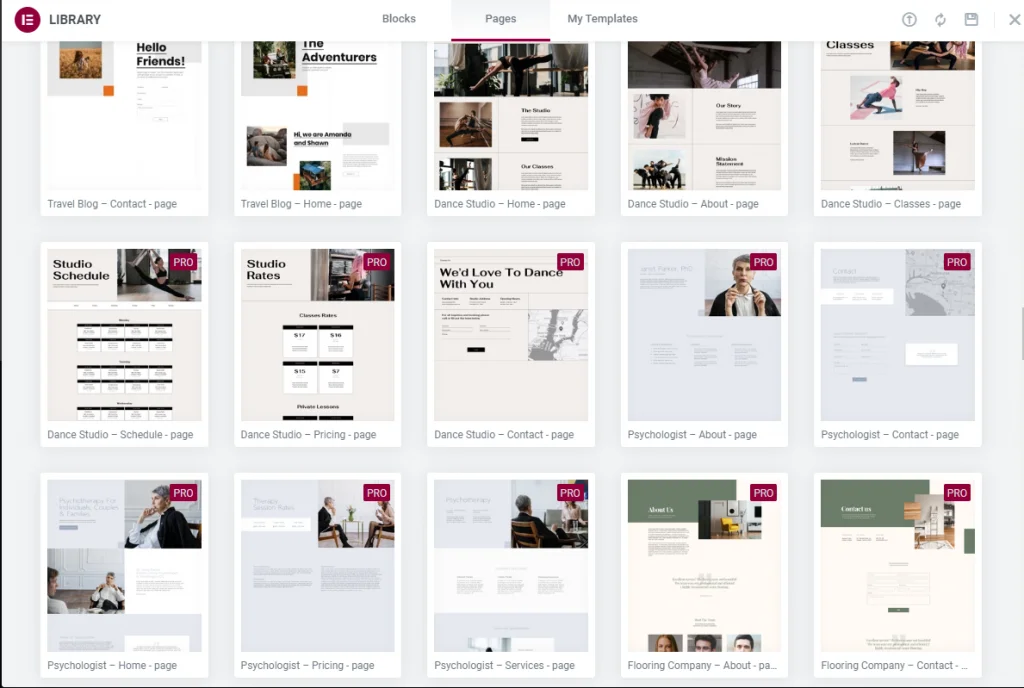
Generally, when building a website, you will also purchase an Elementor plug-in. There are many components that can help you build the website style you want. You need to install these two plug-ins, and Pro needs to be purchased.

You can choose the components you like and mix and match them freely.
Or select a page that has already been created and we can modify some key information.
Okay, that’s it for this blog. If there are still any unclear points, you can leave a message and I will consider whether to write another related introductory blog.

![[2024] Google SEO Optimization Beginner’s Guide: 20-Minute Getting Started Tutorial](https://www.jimiearn.com/wp-content/uploads/2024/11/main-works-of-search-engine-optimization.jpg)